Managing Users and Access Rights
Deltanji is designed so that different users may be allowed access to certain function and features, and denied access to others. This is done by defining User IDs and Access Rights.
For more information, see the article on users and access rights.
User IDs
User IDs can be managed by navigating in the folders panel to Setup -> Users. To add and modify User IDs:

1. Double-click on the User ID, or choose File -> New from the menu bar to add a new User ID.
2. Fill in the fields in the dialog.

- User ID
- The ID of the user. This needs to conform to the valid naming conventions.
- Name
- The name of the user, or a short descriptive title.
- Aliases
- Other user names by which this user account can be accessed.
Note: Only define aliases if credentials obtained from an external security infrastructure do not match Deltanji User IDs. Wherever possible, avoid the need for aliases by standardizing user naming.
- Access rights
- A list of access rights assigned to the user. This list controls access to various Deltanji elements where access rights apply.
- Password
- Unless Deltanji has been integrated with an external security infrastructure, this field specifies the password that the user must provide in order to access Deltanji with their User ID.
- Re-enter password
- This must match the above field.
- Cancel all checkouts?
- If checked, this user will be able to cancel the checkouts that other users have performed.
- Date format
- Controls whether the user should be shown dates formatted as "MM/DD/YYYY" or "DD/MM/YYYY".
- Menu overrides
- On the "Advanced" tab of the dialog are fields that allow configuration of which site-defined menus should be presented to this user in place of specified standard menus.
Access Rights
Access rights can be used to determine what different users can do with various elements of the Deltanji environment:
- Locations - determine who can access each location.
- Location Lists - determine who can access each location list.
- Menus - determine who can access each part of the navigation menu.
- Functions - determine who can perform each possible function within Deltanji.
- Transfer Routes - determine the routes down which each user can transfer objects and change requests.
For most types of element to which access rights can be applied, the setting is optional and if none have been applied the element is unrestricted. The exception is Transfer Routes, for which specifying at least one access rights is mandatory.
Adding and Modifying Access Rights
Access rights can be managed by navigating in the folders panel to Setup -> Access Rights.
1. Double-click on the access right you want to modify, or choose File -> New from the menu bar to create a new one.
2. Fill in the fields on the dialog.
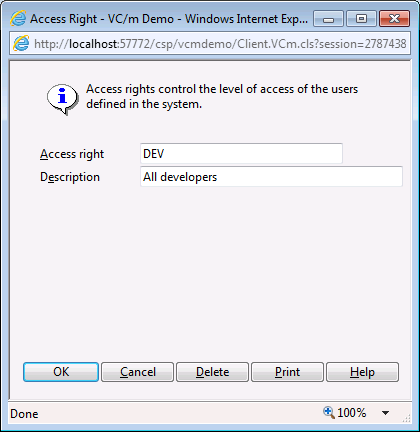
- Access right
- The name of the access right. When applying access rights to different aspects of your Deltanji environment, this is what you provide. This needs to conform to the valid naming conventions.
- Description
- A short description of the function of the access right, perhaps detailing the type of user to whom it may apply, and the kind of access it might entail.
Applying Access Rights
Access rights can be applied to the various aspects of your Deltanji environment that are listed above. For more information about how to apply access rights to these areas, see the articles on managing locations, managing location lists, menu customization, managing functions and managing transfer routes.
Multiple access rights can be applied in the following way:
DEV,MGR - The user must have either DEV or MGR access rights to access this element of the Deltanji environment.
(DEV,DEV1),MGR - The user must have both DEV and DEV1 access rights, or MGR access rights to access this element of the Deltanji environment.
See Also: Integrating with InterSystems Security, Users and Access Rights, Managing Locations, Menu Customization, Managing Functions, Managing Transfer Routes